
Just a quick post to share my latest makes, and to share a quick way of making a cushion back using an old shirt!
After a bit of a break from creative sewing last year, except for a few commissions, I've finally got back into sewing again and realise how much I've missed it.

Last year I pieced together this triangles cushion front and hand quilted it, but then never found time to make it into a cushion.
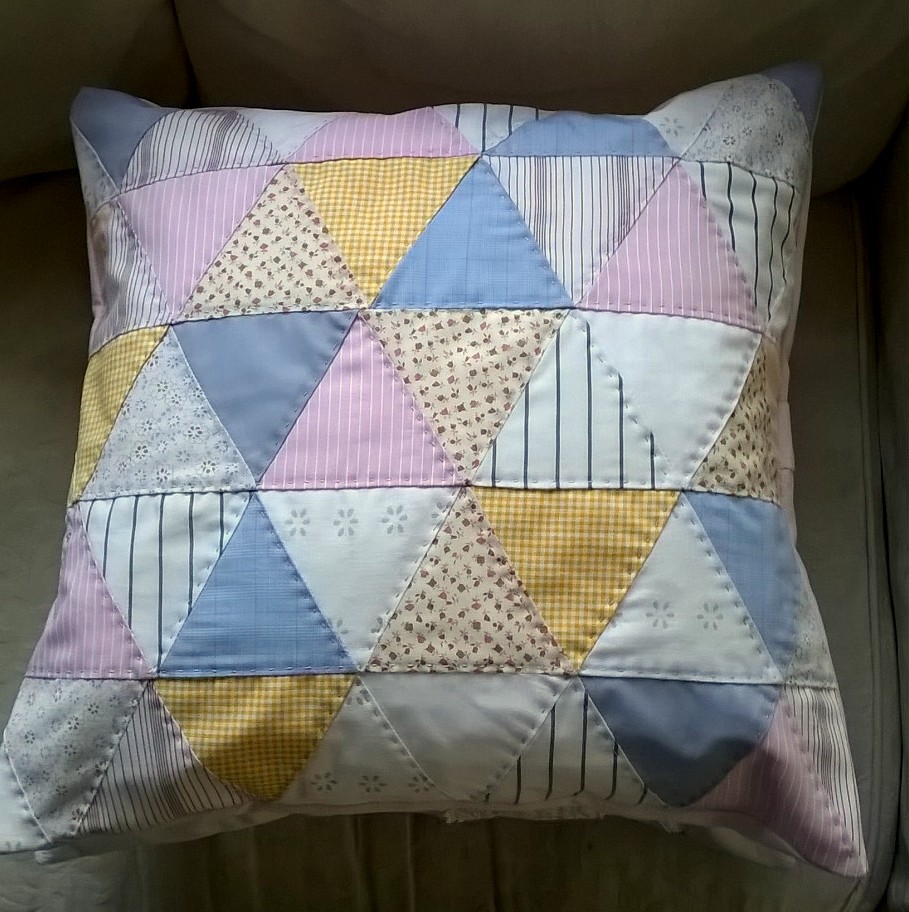
I've now finished it using an old work shirt as a back.

I love to use this method as it is both a good way of getting more use out of a shirt no longer fit to be worn, and for making a quick cushion back without the fuss and bother making buttonholes (which I hate) or having to cut out fabric to make an envelope closure.
How to Use an old Shirt to make a Cushion Back
Lay out an old (but washed and ironed) shirt and cut along the side and shoulder seams to separate the shirt front. (Remove breast pocket if it has one)
Using your finished cushion front as a pattern, place it carefully onto the shirt front making sure the button closure is placed centrally, and check the buttons /buttonholes are not where you will cut.
Once you are happy with your placement, pin the cushion front to the shirt and cut around it.
Now place the cushion front and shirt back right sides together, making sure to undo two or three buttons to allow for turning it the right way round once sewn up, then stitch together around all four sides.
Trim seam to within 1/4" of stitching and neaten off either with zig zag stitch, pinking shears or using an overlocker.
Turn cushion cover to the the right side and press.
Job done!

I also used this method of cushion back for another cushion which goes well with this one.
This one is made from vintage linen and vintage lace.

Both of these cushions will be heading into my Etsy Shop this week.


At the weekend I added some pockets to a reversible apron I made for my Mum a couple of years ago.
Before, without pockets.......


And after......now with pockets.....a large one on the floral side....

.......and a smaller, double pocket on the patchwork side

The double pocket came about by chance. Attaching a long pocket like the one on the reverse would have covered up a lot of the patchwork design, and having already sewn up the double sided rectangle I just folded it in half, then dropped it down an inch, then attached it to the apron stitching down two sides and the bottom leaving both top sides free.
Voila! A double pocket.

I made another one of these reversible patchwork aprons for my daughter.
One side is a pretty strawberry print on a white background with a contrast waist band and ties in a little red polka dot fabric.


The other side is the strawberry fabric striped with the red polka dots fabric.


Hopefully the weather is finally warming up now.
I came across this photo yesterday of daffodils in my garden flowering at about this time, on 10 February 2014, but I cannot even see the buds yet this year, so Spring is well behind at the moment compared to past years.

Also from the past, I came across these sweet photos of our Toy Poodle Logan with our beloved Bessie whom we lost a couple of years ago. A bit fuzzy, but so cute lying next to each other and acting in unison with first their sleepy heads up, and then heads down!
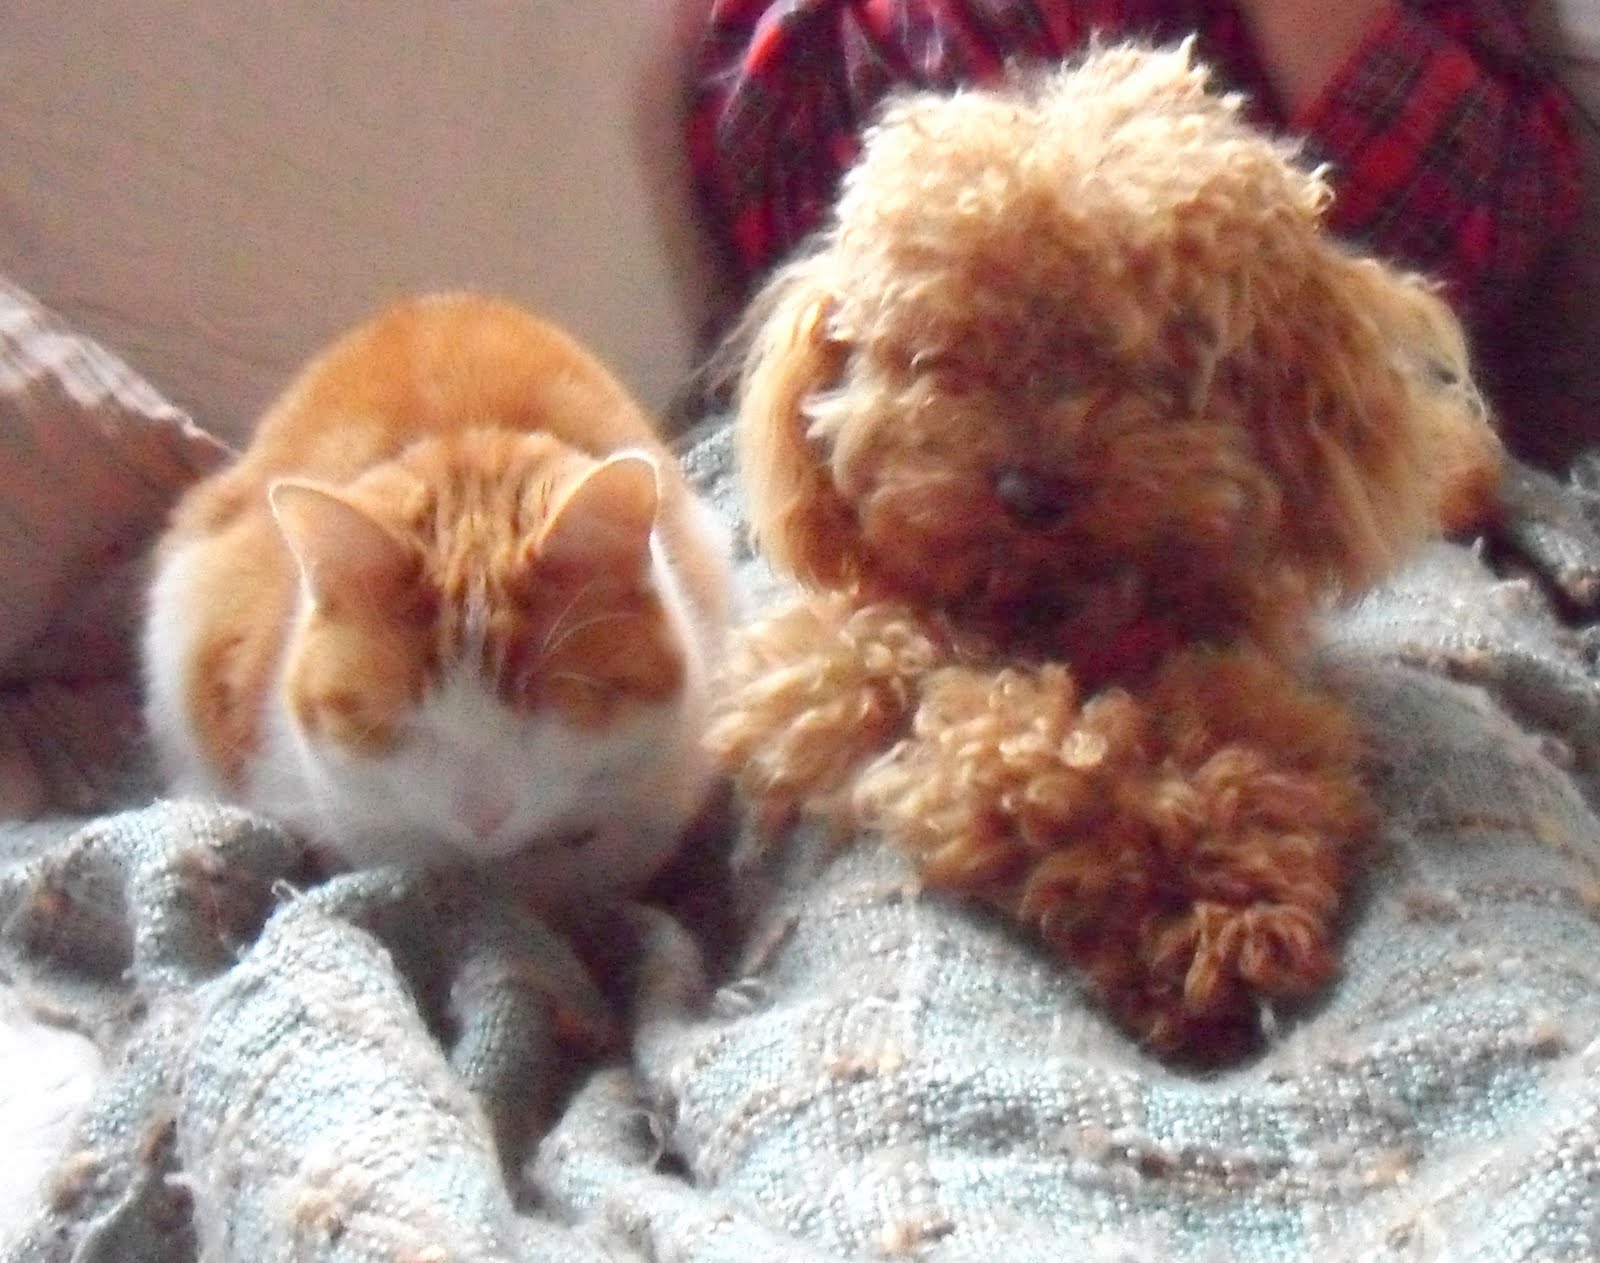
heads up.....

and heads down!

playing in the sun

Cat in a pot!
We do miss our Bessie!
Thank you for all your comments on my last post, it is lovely to hear from you and I'm trying to visit your blogs too.
Have a good week everyone!